Font Awesome
This lesson shows you how to create a page using "Font Awesome." Font Awesome is a toolkit of vector-based icons and social logos you can use for free, or pay a fee for additional icons and features. As vector icons, you can scale the icons to be larger or smaller with no loss in quality.
The documentation for the toolkit can be found at: https://fontawesome.com/how-to-use/on-the-web/referencing-icons/basic-use. We prefer to host Font Awesome on our own site, so we'll be using that system below. More on that can be found at https://fontawesome.com/how-to-use/on-the-web/setup/hosting-font-awesome-yourself. You can see all of the free icons at: https://fontawesome.com/icons?d=gallery&m=free.
Follow the series of steps below.
1. Download and extract the images.zip file used in these lessons. The file will expand into an "images" folder. Place the folder into the same folder as the HTML file you create.
2. Review the site in the window below or go to it at: http://grid-layout.com/extras/font-awesome/fa-after.html. Notice the plane, ship, and bus icons on the "Transportation" page and the mail, phone, and pointer icons on the "Contact Us" section.
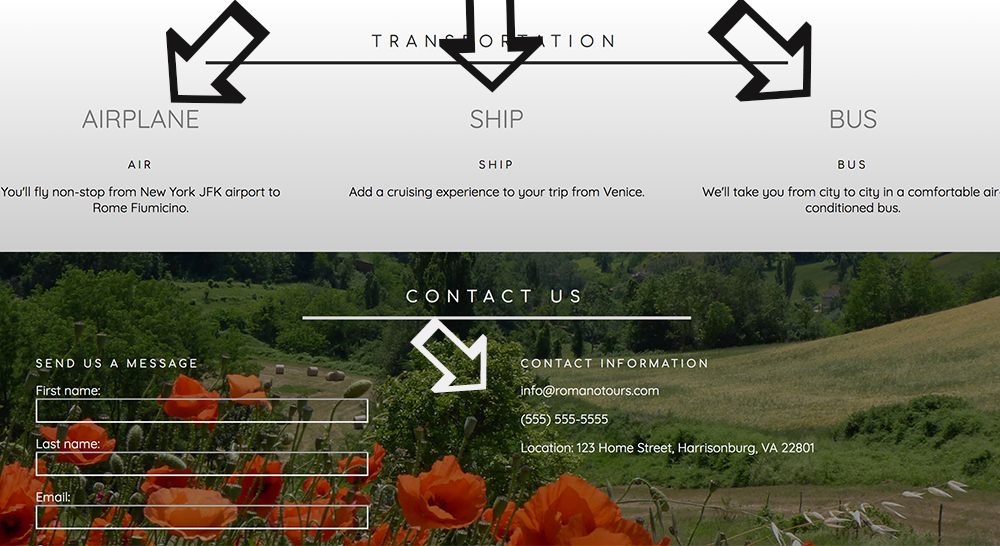
The illustration to the left shows what the page looks like BEFORE adding Font Awesome icons. The arrows are pointing to the areas where we will add the icons.
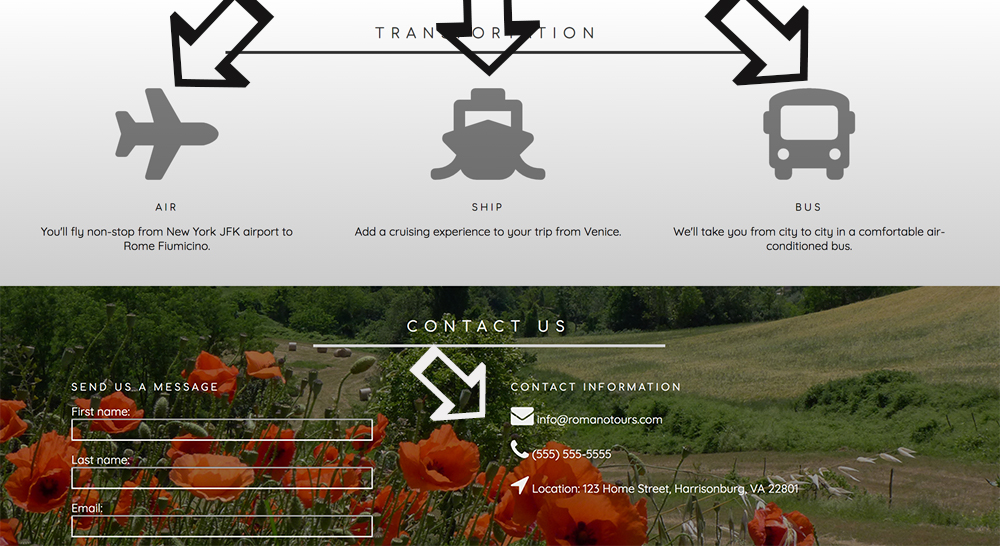
This illustration to the left shows what the page looks like AFTER adding Font Awesome icons. The arrows are pointing at the icons we will add in this lesson.
3. Load the following page, view source, then copy and paste the text into a new text document. I recommend using Brackets for creating your pages. Save the document as font-awesome.html. This will be the starting point for our lesson.
http://grid-layout.com/extras/font-awesome/fa-before.html.
4. Download the zip file of the latest release of Font Awesome at https://fontawesome.com/how-to-use/on-the-web/setup/hosting-font-awesome-yourself. As of this writing, the latest version is fontawesome-free-5.13.0-web.zip. Click on the link that says "Download Font Awesome Free for the Web." Double click on the .zip file and it will extract a folder of contents.
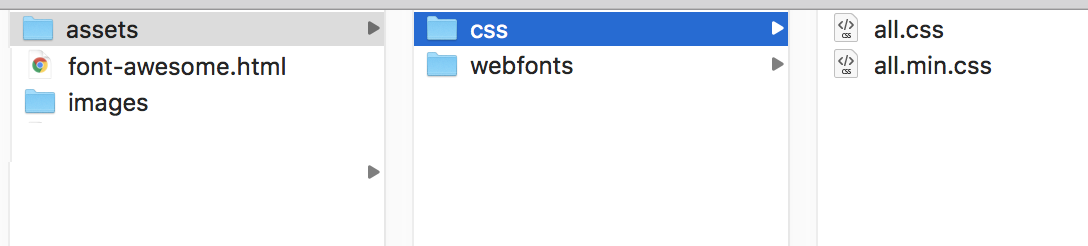
5. Create an assets folder within the folder where you saved font-awesome.html, make a css folder within the assets folder, then copy the files all.css and all.min.css into the css folder. Next, copy the folder webfonts into the assets folder as well. The image to the left will make clear the path structure you want to create.
6. Add the following code for the CSS library to the head section of the document, as below.
<link href="assets/css/all.css" rel="stylesheet">
</head>
![]()
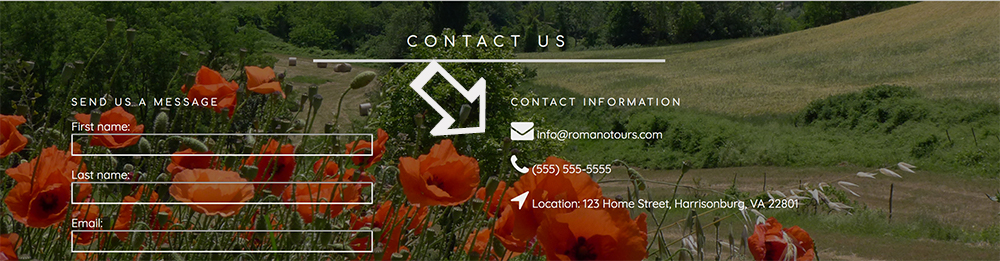
We'll now make the plane, ship, and bus appear on the page as shown on the left.
7. The first element we want to make into an icon is a <div> with a class of transportation-icon1. We will add an empty italic element <i> to add the icon within that element. Find <div class="transportation-icon1"> within the HTML of the document (approximately line 410), remove the upper-case word "AIRPLANE", and replace it with the following <i class="fa fa-plane fa-4x"></i>, as shown below.
<p class="icon"><i class="fa fa-plane fa-4x"></i></p>
<h3>Air</h3>
<p>You'll fly non-stop from New York JFK airport to Rome Fiumicino.</p>
</div>
The 4x indicates that it should be four times larger than its default size. You can use the values 2x, 3x, 4x, 5x, 6x, 7x, 8x, 9x, and 10x. However, sometimes you might want to have an icon even larger than 10x.
We can do that by increasing the size of the font in the parent element. Notice there is a <p class="icon"> applied as the parent of the <i> tag. Icons inherit the font-size of their parent container which allow them to match any text you might use with them. With the classes such as 2x, 4x, etc., you can increase or decrease the size of icons relative to that inherited font-size.
Notice below how the parent class of icon is set to 2em. We also lowered the opacity, which makes the icon appear more gray than black.
font-size:2em;
opacity: 0.5;
}
8. Do a similar process for ship and bus icons. The ship is inside a <div> with a class of transportation-icon2 and the bus is inside a <div> with a class of transportation-icon3.
<p class="icon"><i class="fa fa-ship fa-4x"></i></p>
<h3>Ship</h3>
<p>Add a cruising experience to your trip from Venice.</p>
</div>
<div class="transportation-icon3">
<p class="icon"><i class="fa fa-bus fa-4x"></i></p>
<h3>Bus</h3>
<p>We'll take you from city to city in a comfortable air-conditioned bus.</p>
</div>
Finally, we'll add three icons into the "Contact Us" pane.
9. In your HTML, find the <div class="contact-info> tag. (On approximately line 447). Add the following to the HTML.
<h3>Contact Information</h3>
<p><i class="fa fa-envelope fa-2x"></i> info@romanotours.com</p>
<p><i class="fa fa-phone fa-2x"></i> (555) 555-5555</p>
<p><i class="fa fa-location-arrow fa-2x"></i> Location: 123 Home Street, Harrisonburg, VA 22801</p>